I’m moving!

Vodka and Velvet is moving! I’ve re-named and re-branded and am moving to a new domain. Same author, same posts, same witty banter that I know you all love SAH much! I can tell myself that anyway.. so please head over to my new home and give me some following love!

I will now be blogging as The Little Red Blogger. I wanted a name that reflected me (my nickname in high school was Little Red,for obvious reasons. I’m barely 5’3″ and have blindingly red hair), and was finding Vodka and Velvet a bit too generic for what I hope will eventually become my ‘brand.’

So come on over, lovely followers! And keep your eyes peeled for some fresh and exciting posts on the way from the Little Red Blogger.

And don’t forget to follow me on Instagram too!

Much love to you all, Peace out!

The Little Red Blogger

xx.

TLRB

Liebster Blogger Award!

liebster-blog-award1

Thank you all so much for following my journey! I’ve only just started bogging and have SO much more to share with you all so it makes me so happy to have been nominated by barbaramari from Playing Dress Up for the Liebster Blogger Award! Make sure you check out her blog guys, always such a refreshing read. And the Liebster Blogger Award is such a great platform to get the word out there about up and coming new bloggers.

There are just a few rules when accepting the award:

1. Acknowledge the blogger that nominated you.

2. Answer the questions they set.

3. Nominate 10 different bloggers that have less than 200 followers.

4. Inform the bloggers that you’ve nominated them.

5. Post 10 questions for them to answer.

So here are my answers to babaramari’s questions sent to me:

1.  What is your go to outfit?

Skinny jeans, boots and a sweater for day and a great pencil skirt with some killer heels for night

2.  Describe your style in three words:

edgy, clean, and over-accessorised

3.  What is your dream job?

to run my own successful fashion label.. stay tuned!

4.  Favorite food?

anything Mexican

5.  Who is your celebrity crush?

Johnny Depp. Can you blame me?

6.  What is you dream vacation?

a month long stay in Bordeaux, France. With all of the wine you could ever need! Heaven.

7.  Something none of your readers would ever guess about you:

I have an irrational fear of clowns and garden gnomes and I can not explain why

8.  How long have you been blogging for?

I started a year ago but stopped after 2 posts, but have back into it for about 3 weeks now. I’m just a baby!

9.  What is your favorite post you have posted?

Probably my foodie posts. Like blogging, I have just started becoming very experimental in the kitchen and I love sharing my creations with you guys!

10.  What is your favorite song at the moment?

Hozier – Take Me to Church

And now for the fun part. I nominate:

Living in Plaid

Chiquessence

ennairs

State of Greyce

Sew Sin City

It Girls Off Duty

Things That Shine

Honey Hi Stitches

Pretty Girls Sew

Better Be a Hit

And the questions for you guys to answer are:

1. When and why did you start blogging?

2. What is your go-to outfit

3. How would you describe your style?

4. Who is your style icon?

5. Favourite place to holiday?

6. Stripes or Plaid?

7. Summer or Winter?

8. What is one outfit you regret?

9. One item in your wardrobe you cant live without?

10. Your number one most favourite blog ever?

Happy blogging and good luck!

xx.

DIY bed skirt

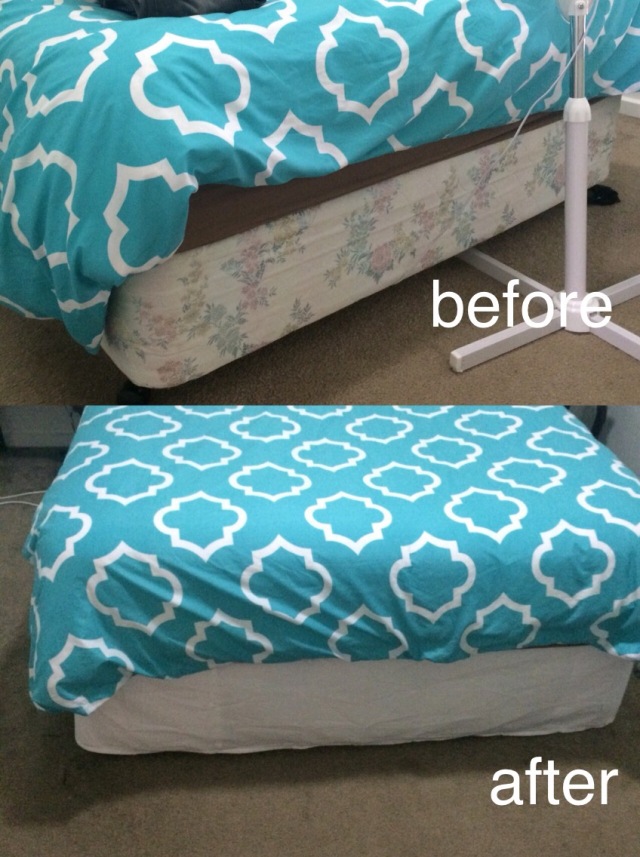
Ok, so just to brief you yes, I made a bed skirt and no, I’m not an 80 year old woman. I am a very bored fashion student on Uni holidays. In hindsight I should have perhaps made myself an actual skirt.. But my bed is very happy and looks much fancier now so we’ve all won here.

Basically how it all started is that with all of my free time of late I have become addicted to Pinterest. Addicted! (Feel free to follow me on Pinterest here. {Insert shameless plug}) And all of my Pinterest-trawling led me to believe that my bed was, in fact, hideous. The more I pinned, and the more time I had off work and school to dwell on its hideousness, the more I realized something had to be done. And asap!

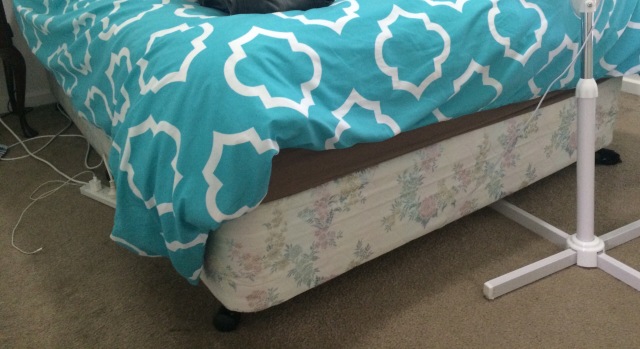
Here is a before of my hideous bed. Sorry about the mess. (Seriously, would it have killed me to clean my room before taking this?)

2015/01/img_0683.jpg

Ok, maybe hideous is a bit of a strong adjective to use. My bed is just a modest ensemble with a slightly dated (see: ugly) floral print on the base. This floral print needed to go.

I found lots of useful how-to’s on Pinterest and found the easiest one I could and got to work.
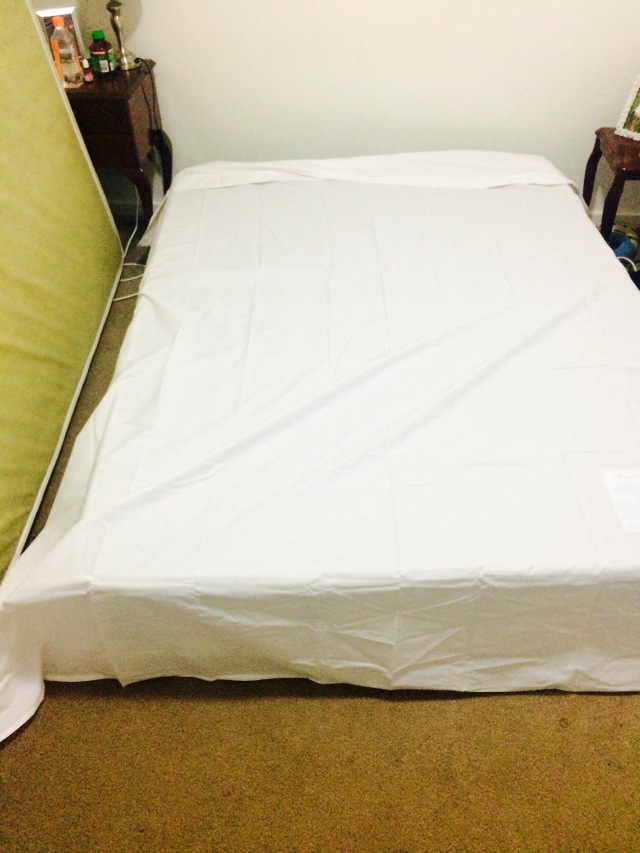
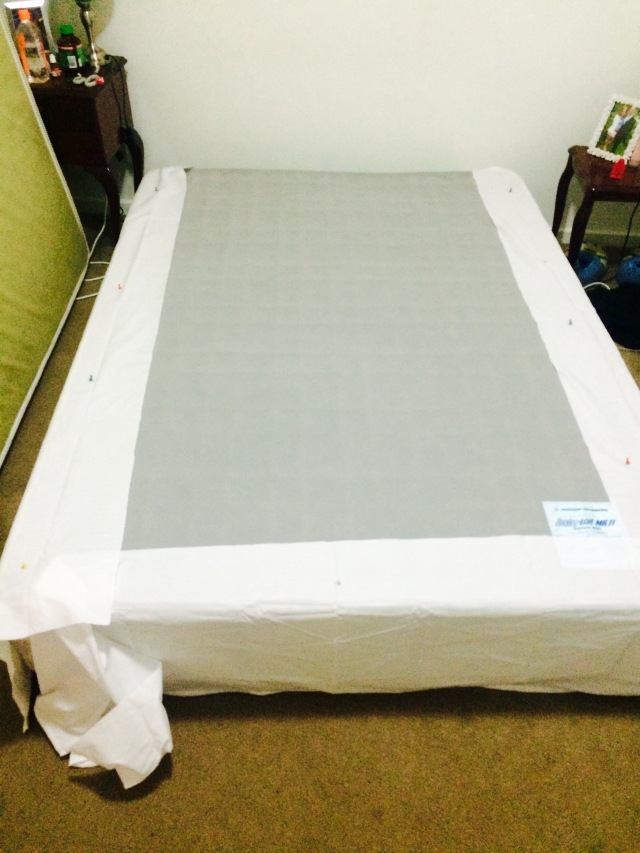
For the fabric I just bought a new sheet (my bed is queen size and I bought a double bed sheet which was more than enough) but you can use pretty much any fabric you like. Once I got the mattress off the bed (with much struggle and a bit of cursing) I threw the sheet over the base like so:

2015/01/img_0695.jpg

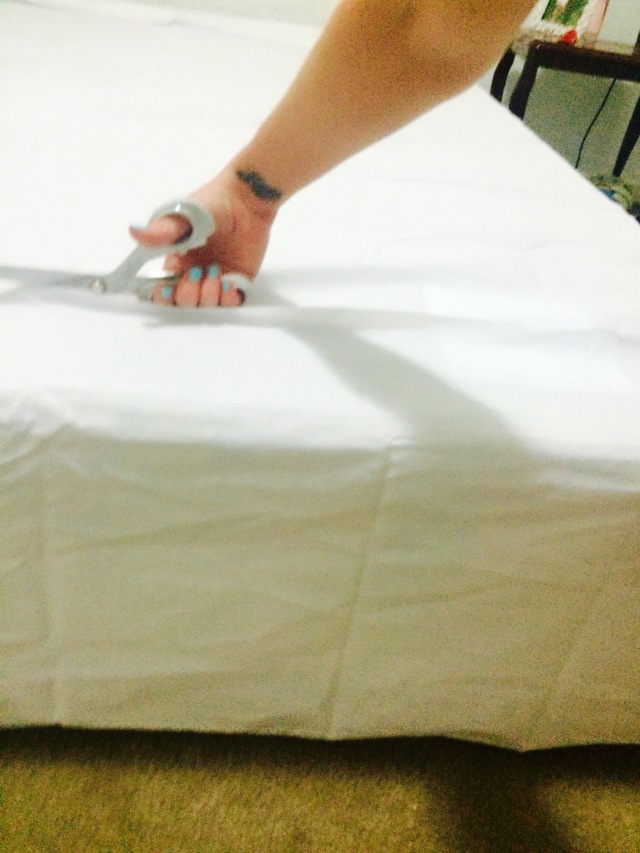
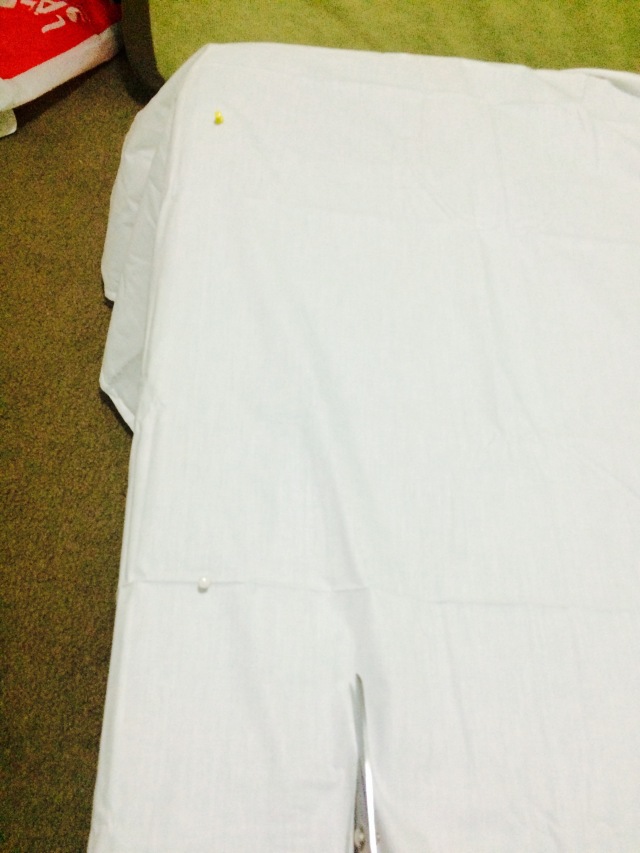
Then I pinned the sheet up to where I wanted it to sit just touching the floor at the end of the bed and got snipping

2015/01/img_0697.jpg

And did the same thing with both sides

2015/01/img_0698.jpg

So it ended up looking like this:

2015/01/img_0699.jpg

As you can see I didn’t bother doing the head end of the bed as you don’t see it anyway but you can do it by following the same process.
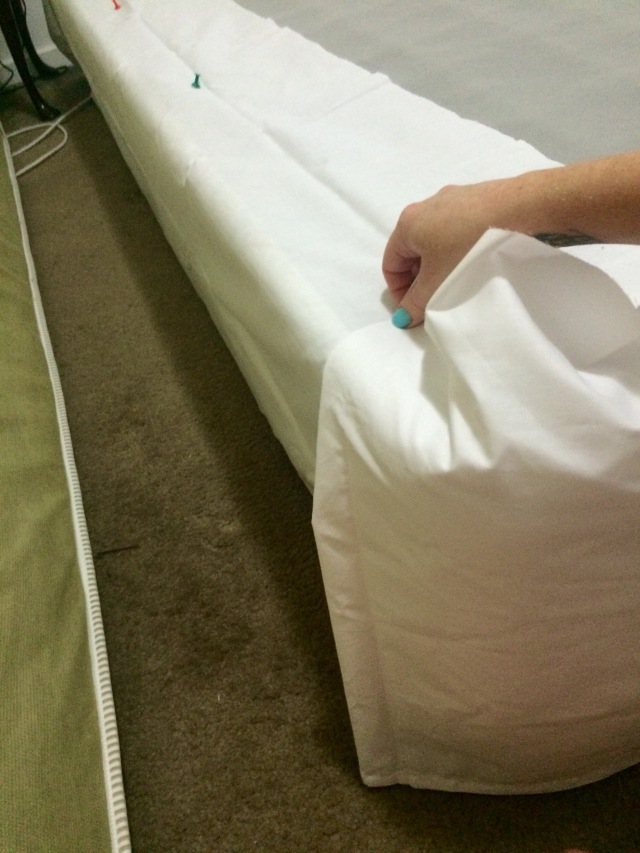
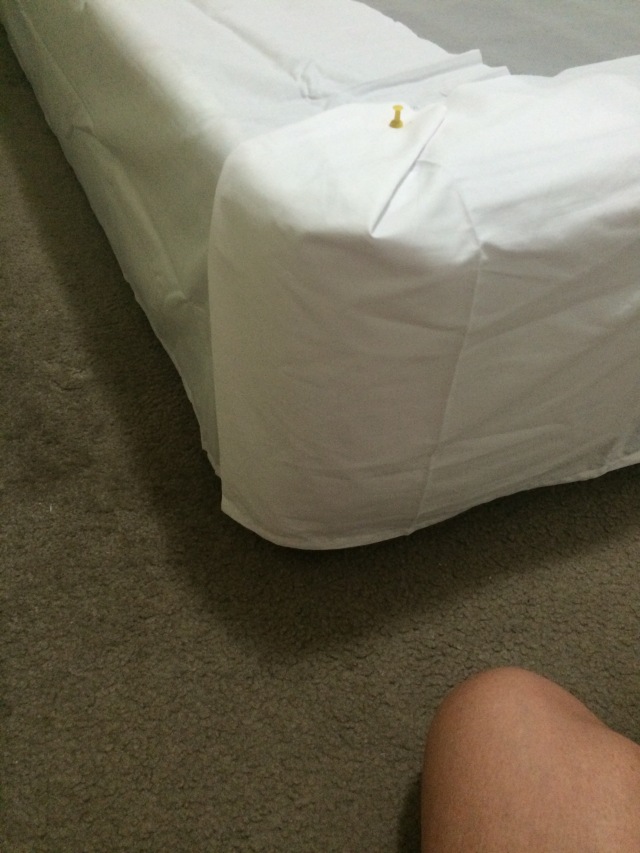
Ok so now I have a lot of fabric hanging over each corner which I don’t want so instead of chopping it I just folded the front of the corner around to the side of the bed and pinned it where I wanted it to go.

2015/01/img_0700.jpg

2015/01/img_0701.jpg

Then all you do it use dress pins wherever the pieces will be joined together, and at your folded corners and run it through a sewing machine. Easy! To attach to the bed you can just pin it to the base as the mattress will be heavy enough to hold it in place or use pieces of Velcro stripping, that way you can easily take it off and wash if need be.

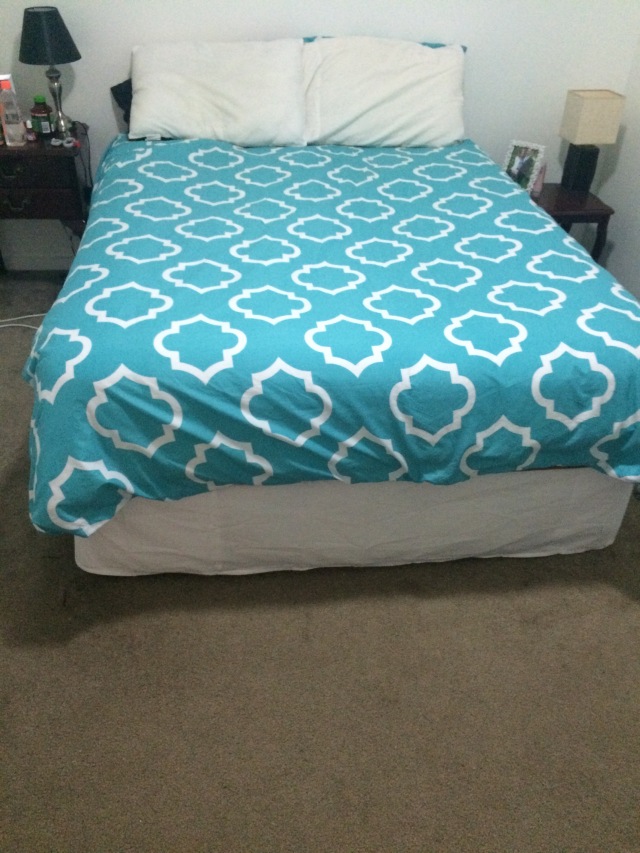
Here is the finished product!

2015/01/img_0702.jpg

Besides the fact that I haven’t ironed it for photo I am very happy with the result! And so is my bed. She feels very fancy now.

Xx.

2015/01/img_0803-0.jpg

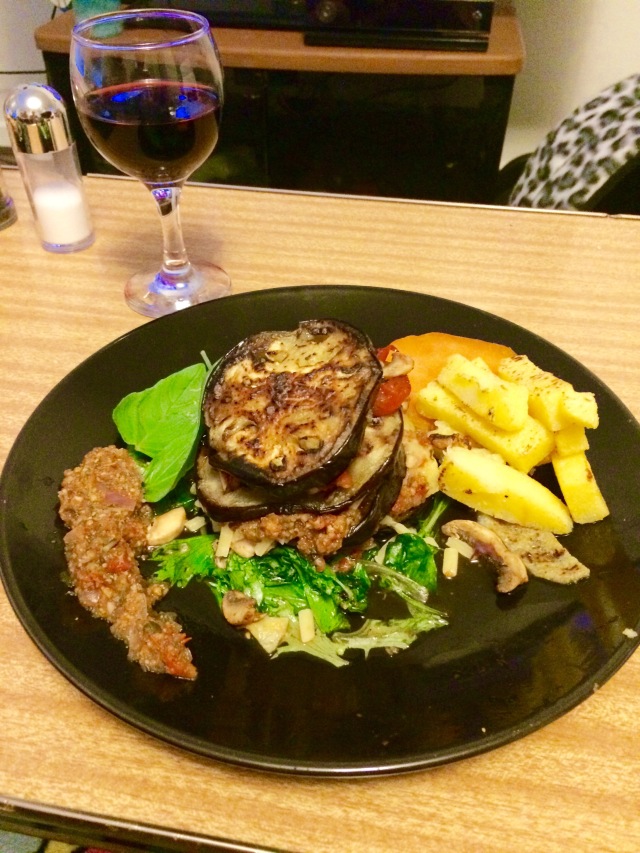
Vegetarian ‘Lasagne’

2015/01/img_0741.jpg

So Tom (the boyfriend) and I have decided that once a week we’re going to have a completely vegetarian meal. For the most part out meals are fairly healthy but there’s always room for improvement! Last night was my turn to make a vegetarian feast. I’d seen a few recipes for a vegetarian lasagne in the past that looked amazing and I LOVE grilled eggplant so decided to give this recipe a go. This was also the first time I had ever cooked with eggplant or polenta so it was rather experimental, but turns out it was totally easy so that frozen pizza I had as a back up turned out to be unnessasary. Phew!

Ingredients:
• 1 eggplant (sliced)
• mixed leaf salad bag (I used kale, spinach and rocket)
• tub of cherry tomatoes (roughly chopped)
• coconut oil
• packet of ready made polenta (you can get this from health food stores or the ‘Asian foods’ section at Woolworths. I have no idea why..)
• basil (roughly chopped)
• 1 red onion (diced)
• 1 large clove of garlic (diced)

Method:
The first thing I did was make the tomato sauce, which really was more like a relish and possibly my favourite part of the whole dish. It was so easy and SO yummy! To make: dice red onion and garlic clove and cook down in a pot until the onion is slightly caramelised. Add diced cherry tomatoes and chopped basil leaves. I added a tiny amount of water at this point just to make it a bit more sauce-like. The sauce only needs to be cooked for about ten minutes until all ingredients are cooked down and combined. I ended up blending it once it was cooked to get a finer consistency, which is worth doing if you have a blender, but not really necessary.

Now for the eggplant and polenta. Drizzle some coconut oil into a fry pan, throw in your sliced eggplant and polenta (cut into either flat slices or chips) and fry for about 5 minutes. Make sure you flip both. The polenta will get crispy on the outside when it’s done and the eggplant will be soft and slightly brown. And now you stack!

Make a bed of salad leaves and start stacking layers of eggplant, polenta your delicious tomato relish. You can throw in anything else you like as well. I spontaneously added a layer of mushroom and some left over diced tomato as well.

And vóila! Delicious, healthy and SO easy. And really not as scary as I thought it was going to be. You can call me Jamie Oliver.

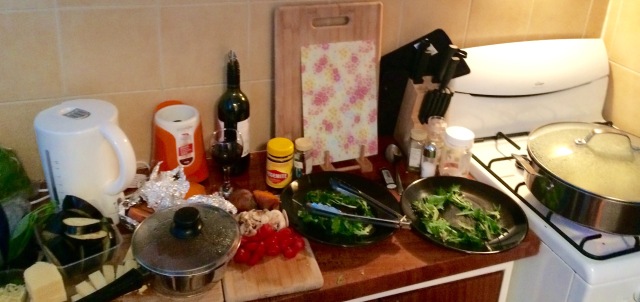
2015/01/img_0737-0.jpg

I just had to share this picture of my kitchen during the process of making this meal. Turns out I’m a very messy cook. Perhaps not quite Jamie Oliver.. But the end result was totally worth it!

Xx.

Cauliflower Pizza. What..?

I’ve had a recipe for a clean(ish) pizza base made from cauliflower pinned on Pinterest for some time and finally had the time to give it a go the other night. As strange as cauliflower pizza sounds it was actually delish and SO easy to make! I did suffer some third degree burns to my finger and potentially left it in the oven for longer than I was supposed to (due to a wet nail polish situation. What can I say? I like to multi-task) but it turned out amazing in the end and even got a thumbs up from my very skeptical boyfriend. I’ll definitely be making this one again!

Ingredients:

  • 2 cups grated cauliflower (I blended it because I’m lazy)
  • two eggs, 1/4 cup grated cheese (I used mozzarella but am very keen to try Parmesan next time)
  • any herbs and spices your little heart desires (I used Italian herbs blend, chilli flakes, salt and pepper

Method:

Pre-heat oven to 180°, Mix all ingredients together well, then flatten out onto a pre-greased oven tray. Bake for 20 minutes until golden then add pizza toppings and bake again for a further 10-15 minutes and voila! Delicious and healthy home-made pizza. Feel free to use this one to show off to your friends.

xx.